https://nasacademy.com/blog/article/how-to-edit-videos-for-youtube-with-final-cut-pro

Editing is the stage in production where your story starts to really come together. The way you sequence your clips and accompany your footage with sound, transitions, and effects has everything to do with the way your story is understood, and how your brand is perceived. So today, we’re going to show you how to edit YouTube videos with the industry standard software, Final Cut Pro.
And don’t worry – we’ll start at the very beginning.
Final cut pro is an industry standard, user-friendly editing software that was developed back in the mid-90s by Macromedia. It was created as a rival option to the popular Adobe Premiere Pro – but was designed specifically for Apple computers.
This software is praised and used religiously by top filmmakers in the industry. But the good news is: you don’t have to be a rich, Hollywood creator to use it. Since the price was significantly reduced after it’s initial release, now, people of all calibers all over the world are using it for all different reasons. It’s very popular amongst YouTubers, and just goes to show how decentralized the creator economy is becoming – something we love to see here at Nas Academy.
Over the years, there have been multiple iterations of Final Cut Pro. From the cheaper, “express” version that was discontinued, to the latest version, Final Cut Pro X, developed in 2011, it has consistently remained a leading choice for video editors.
Final Cut and most other video softwares these days are much more affordable, practical and time-saving methods to traditional film editing. But to those who are beginners and who might now know what libraries, timelines, trimming, J-cuts or L-cuts are – the entire process of video editing (let alone the interface of Final Cut Pro alone) can seem just as daunting.
And that’s why we’ve laid out this simple Final Cut Pro Tutorial for you, to help show you the ropes of an industry standard editing software, as well as some helpful tips on how to edit YouTube videos so you can tell your story better.
When it comes to editing YouTube videos for your channel, the single most important thing is to know your software well. Know the layout, the options and the tools available to you in order to get the most out of the platform. This will require you to take some time and watch tutorials, do your research and play around with the workspace.
While most video editors will have similar layouts, let’s take a look at what you’ll find when you open Final Cut Pro:
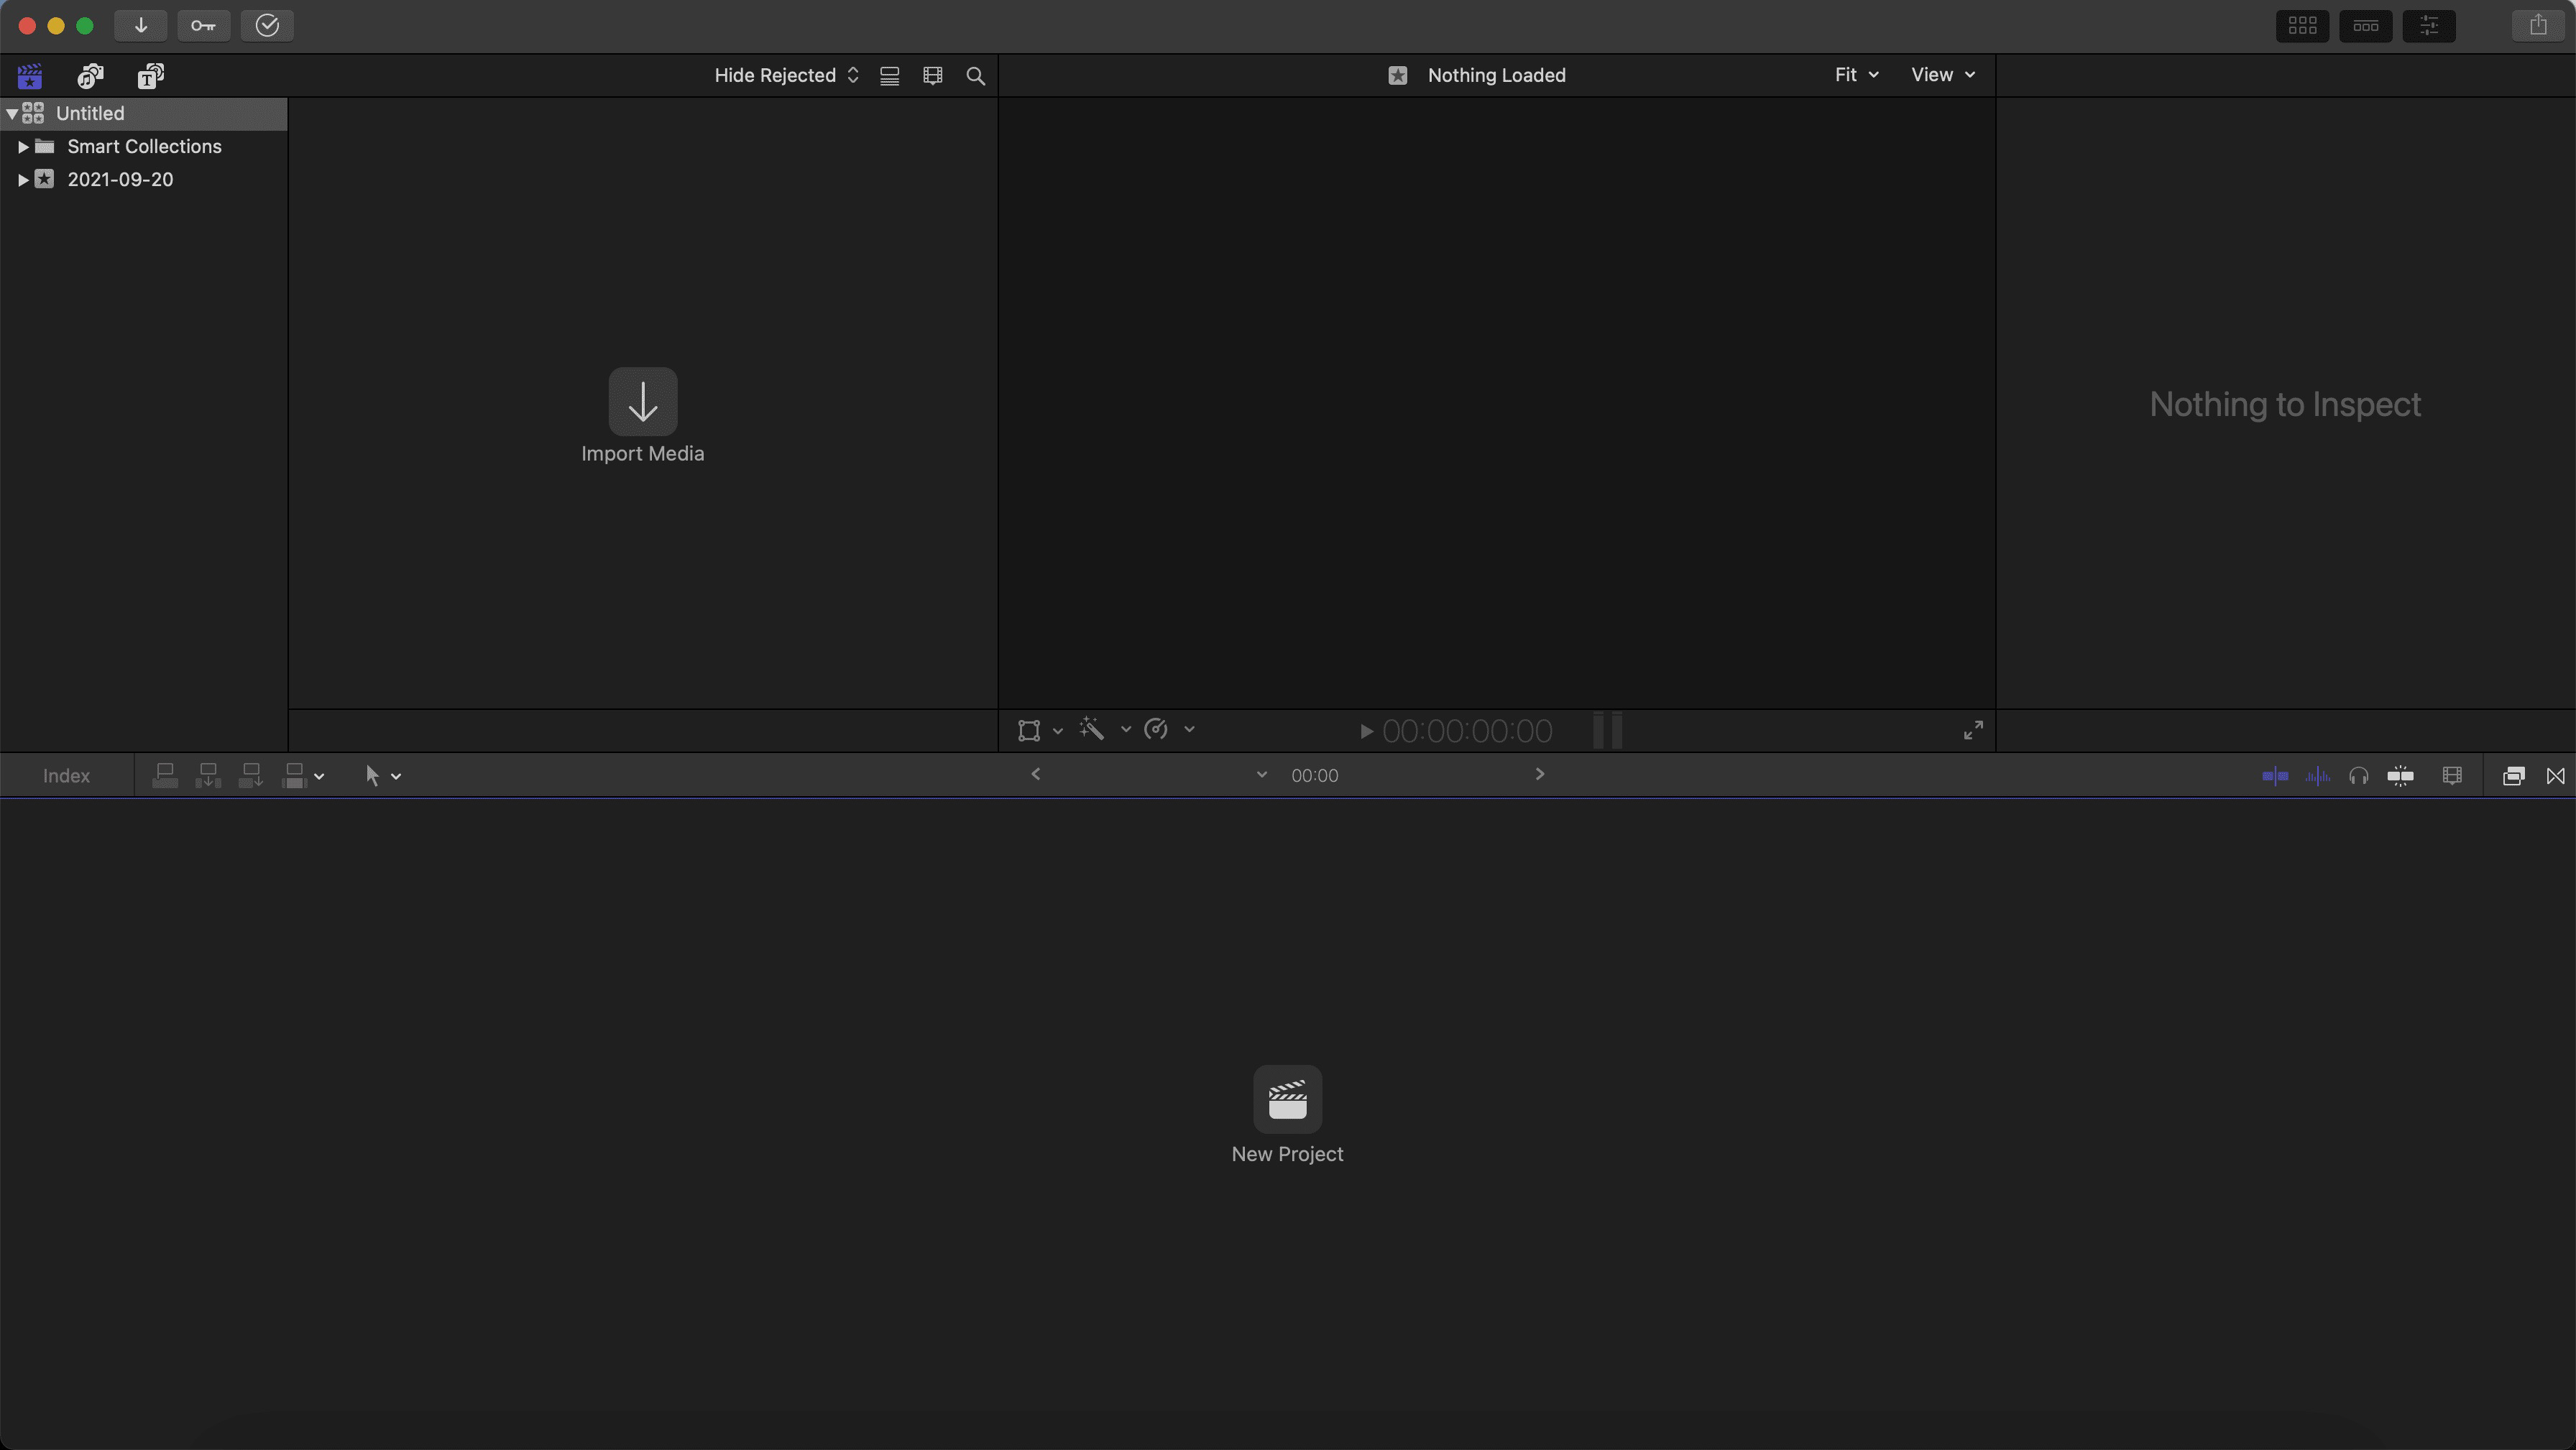
When using the app, all of your work will be held in what’s called a “library”. Your library is like the main folder for your project, that can house multiple different video projects, events and media. You can create multiple libraries to house different projects and tasks. All you have to do is go to File > New > Library.
Libraries keep all of your footage and other media organized into respective folders, so you can have a clean and easy-to-navigate workspace.
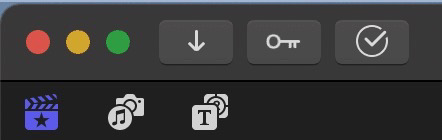
As per the image above, you will find your list of libraries in the top left. If you can’t see them, simply click on the slate icon that has a star on it:

In the top center of your screen, you have your preview screen. This will show you a preview of what your edit is looking like in your timeline, along with any video clip you hover your mouse over in your folders. This way, you can look at any selected piece of raw footage, or choose a certain part of a clip, before bringing it into your timeline.
The top right, where it will say “nothing to inspect” upon opening, is your inspector window. This is where all of your settings and adjustments will pop up throughout your editing. Anytime you select a clip, add a transition, coloring, effects or anything – the opportunity to customize their individual elements will appear here.
The timeline is on the strip below where you will drag and drop your media, trim it, stack it, and reorganize it to create your edit.
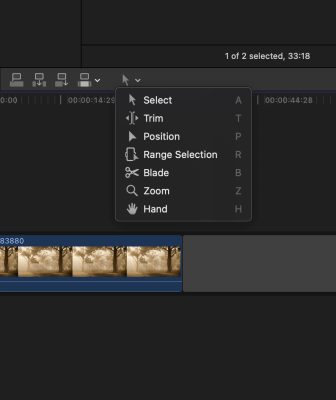
Along the bottom right side, you will see a list of all of your effects, tools and premade, Final Cut Pro transitions that can help add some value and interest to your YouTube videos. And when you start clipping together your footage, you can click on the arrow right above the timeline (as seen in the photo below) and this will give you the options for different tools, to help you with cutting, repositioning, and shifting clips.
Take a look and test out each one, learn their functions, and get a feel for their unique features:
Once you’ve familiarized yourself with your initial workspace, you first want to create and title your library, and then import your footage into that library. When you start to import your media, all of it will combine into what’s called an “Event”, that will appear as a folder with a star within your Library. To import footage, simply go to the downward pointing arrow at the top right of your screen and click to navigate through your files.
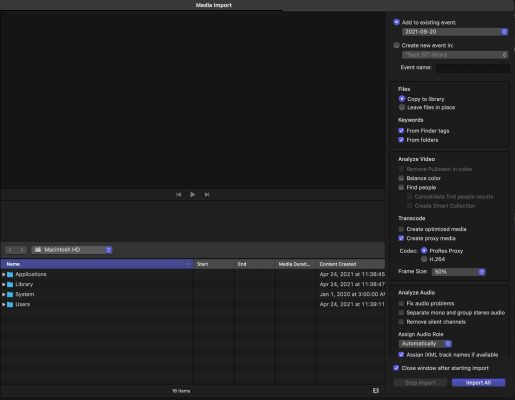
Once you find the footage you want to import, you will get a series of options. For the most part, if you’re just editing a simple YouTube video, these settings can be left as is. But, a beneficial tool to help smoothen your workflow is to select the option “create proxy media” under the “Transcode” section – particularly if you are working with large files.
This will allow you a smoother editing process as creating “proxies” will create copies of your high-quality video, and reduce its file size for Final Cut Pro. Then, after you’re done editing, you can relink the clips to their initial version, to restore their quality. This way, your computer doesn’t have to work through so much data while you are creating your edit, and your process will be quicker.
You can select the ProRes option if you aren’t worried about file size, or if your computer is older. But if you are hoping to exchange the project with other creators or editors, or are wanting to save storage space, choose H.264.
Regardless of what software you use for video editing, the organization of your footage is imperative to help you become a proficient and successful video editor. It saves you energy, resources and most importantly as an editor: it saves you time.
On your desktop, organize your raw footage the minute you take it off of your SD card. Then, within your libraries, create multiple events for different kinds of media and footage, and then label them for easy navigation. If you want to include images or motion graphics elements into your YouTube videos, create separate folders for these and label them accordingly.
Not only will this practice make it easier on you as an editor, but it’s an important thing to keep in mind if you ever happen to edit for other people – it’s the first thing that employers will look at when hiring you. Because when things are organized, there’s less chance of mistakes being made.
Once you have imported all your media, it’s time to create a project. Creating a project will create a timeline in the bottom section of your screen, and that’s where you will start compiling and laying your clips down.
Simply click the “new project” button in the timeline. Now, you can drag and drop your clips into the timeline and start editing!
To adjust audio in your project, simply click the sound waves right underneath your preview monitor. This will open up a more detailed view of your sound levels, so you can effectively alter and adjust your audio based on your needs. If you want to adjust more of your audio settings, simply click the audio clip in your timeline, and watch your options appear in the inspection window. If you want to learn more about how to edit audio on Final Cut Pro, check out this tutorial here.
When it comes to editing your YouTube videos, using the Final Cut Pro X tools and resources is going to make your process much more efficient, and allow you greater control and effects opportunities over free software. But when it comes down to editing: it doesn’t matter what software you are using that defines the quality of your content, what matters is how you cut together your clips to tell your story.
Pacing is a key element to consider when you’re learning how to edit YouTube videos effectively. After all, our attention span, when it comes to content, is dwindling. For example, on TikTok, you have to get your audience’s attention in the first 3 seconds of your video if you want them to stick around. And when consuming content in general, it often takes less than 10 seconds for people to either stay tuned in, or decide to tune out.
So, make your video interesting from start to finish.
Sit back and watch from a first-time viewer’s perspective. Consider the feel of the edit. If you’re finding yourself bored, your audience probably will be too. Make sure you get to the point, and always ask yourself – is this part supporting my story, or just slowing it down?
A way to keep your pacing in check and hold your audience’s attention, is to use pattern interrupts. Pattern interrupts are simply editing choices that break the uniformity of your video. They snap your audience out of a lull, and make them pay attention.
Some ways this can be done is through cutting to different angles, adding in effects or using intriguing elements like animation. It increases the pace, and wakes people up from the snooze-fest that is the single-take-video of a person sitting in the exact same position, talking for an entire 10 minutes.
This can also be done by cropping in on important moments, adding in B-roll to cut away from your master shot, motion graphics effects, sudden movements, sounds – anything that adds an unexpected element into your video.
In other words: be creative.
While still keeping your messaging in mind, show your style and do what people wouldn’t expect. People are so easily distracted, that including pattern interrupts and intriguing elements is sure to keep them hooked – and keep them coming back.
Adding in elements of motion graphics or graphic design into your edits is an amazing way to boost the engagement and visual interest of your edit. You can invest in a subscription to the popular motion graphics software, Adobe After Effects – but the great thing about Final Cut Pro is that you can purchase an add-on called Motion. This will allow you to get motion graphics design abilities within Final Cut Pro.
But also keep in mind to use graphics selectively.
Adding these elements can be an interesting way to create a bit of a pattern interrupt, help demonstrate your story in a creative way, establish your style and help you build a brand on YouTube. But if it doesn’t add to your story, don’t use them. Don’t use graphics to hide a bad story. Always start with the information, and then supplement with graphics afterwards.
When you are adding designs onto your videos, keep in mind your video format as well. YouTube is often watched on small screens. Make your text effects and motion graphics large and visible. Make your f
raming interesting and have your focal point on screen. Keep your graphics and text away from elements like the play bar, any ads, or other elements your audience can click on. Think about your audience, and how your editing can best support their understanding and experience as a viewer.
When learning how to edit YouTube videos, knowing your cutting styles can help you create more entertaining experiences for your viewers. Using various cutting techniques can help you tell your story more entertainingly, and it really helps you to set the mood or tone of your video.
Try switching between your standard cuts, and focusing on these other editing techniques to help you spice up your video style:

Final Cut Pro has an immense amount of transition options, and using them (mindfully) can also help to bump up the production value of your videos. It can help add some visual interest, and help you seamlessly link sections of your videos together. Simply look at the right panel on your screen for this icon:
On TikTok’s or Instagram Reel’s, you have probably noticed a style where creators use cool transitions between shots of them changing outfits, or seamlessly transitioning into other scenes by covering the camera, and then unveiling it to reveal them in a different setting. This can be an extremely powerful editing tool to keep your audience engaged because it’s something they wouldn’t expect, and it flows very naturally.
By using cool transitions, you can improve your pacing while also using it to build your own style, and help you establish a brand. Try and think of some interesting ways you can use crossfades, swipes or any kind of transition to build a style. Think about transitions when filming your videos, so you can have an easier time adding cool effects and techniques later on in the editing process.
Coloring is a key element to consider when learning how to edit YouTube Videos better, and there’s plenty of options and controls for it in Final Cut Pro.
Make sure to color your footage carefully, so that it aligns with your brand and with the emotion that you want your viewers to feel when watching. Lighter tones, like orange and red, tend to feel warmer and more comforting – whereas blue tends to feel colder and less inviting. Keep color psychology in mind when you edit your videos, to help them be the best they possibly can.
When it comes to video editing, having a back-up strategy for your footage is essential. You don’t want to lose all of your hard work in an accident – and that’s why many editors adopt some kind of a “322” rule, which advocates that you create 3 different copies of your edits, on 2 different hard drives, and in 2 different cloud locations. This way – you are sure to have a back-up somewhere, should anything get corrupted or go missing.
If you want to know how to edit YouTube videos to get the best response out of your audience, it’s not just about the visuals. Simple things like your audio quality or a music choice that you might throw in as an afterthought to your stunning visuals, actually has the potential to make or break the message you are trying to convey – and it can severely hinder the emotional connection you are trying to build with your audience.
Editing audio is easy with Final Cut Pro, and you have access to plenty of effects and editing options to help you take your audio game to the next level. When it comes to picking your music for your edit, ask yourself: what do I want my audience to feel?
What is the tone of your video? Is it uplifting? Is it supposed to be motivational? Calming? Understand how you want your audience to respond, and choose your music accordingly. You can find free music and sound effects through YouTube’s Free Audio Library, but as you start to build yourself as a content creator, it might be worth investing some money into a music library to help yourself stand out. Some popular options are Epidemic sound and Pond5, but there are many out there to choose from.
Audio is extremely important in video editing – in fact, it’s even more important than the quality of the video or any visual effects that you do. So, in order to keep your audience more engaged and help them receive your video better, take the time to consider how you could improve the audio in your edit.
Remember that editing isn’t just about the technical elements to cutting a video together. It’s about cutting together a story – a message. It’s about sequencing your elements in a way that will unfold your story in an interesting way, that will support your intention and create the mood you want to convey.
Think about whether or not you introduce a conflict, a journey, and a resolution. Is there an element of interest that holds the viewers until the end? Does this edit support your message? Does it flow? Are you providing enough value?
Always think of your audience and what they are hoping to get from your video. How do you want them to feel when they’re watching? What do you want them to take away?
Cut the parts of your edit that aren’t useful to your story, or that pull away from it’s core. And most importantly: don’t get too attached to your edit – even though it may be hard when you’ve invested so much work. The sequencing of your story often happens and gets rearranged in editing, and it’s here where you have to think the most about the story you’re trying to tell.
And that’s the beauty of this process.
Regardless of your platform, good video editing also comes with how prepared you are when you shoot. So make sure to always follow best practices, and improve your filming and production skills to become a great filmmaker, and help your post-production process run smoother.
While investing in some decent quality audio, video, and lighting equipment for your shoot can help your editing process, planning your shots and frames to support your vision for the edit is also crucial. Because when it comes down to it, with Final Cut Pro or any other editing software, not everything can be easily fixed in post.
5 years ago, the world had 5 million social media creators. Today, that number is over 50 million.
Welcome to the Creator Revolution. Now, for the first time ever, you can actually get a job doing what you love.
You can be a social media manager, a digital marketer on TikTok, or a community manager on Discord. Not only are these the world’s newest jobs, they are guaranteed to be in-demand in future. And they are way more fun than your average 9 to 5, and pay even better! But there hasn’t been one single place to learn all these skills. Until now.
This is the Creator Accelerator Program. We designed this program to help you skyrocket your career as a creator. From learning how to grow on social media platforms, to building a network and accessing job opportunities with the world’s top brands – this immersive program will transform your career in just 5 months.

Learn final cut pro from Nas Daily Academy

By Team Nas Academy
WE EMPOWER CREATORS.


